# SketchUp (Alpha) 🛠️
IMPORTANT ⚠️
This connector is currently in alpha with limited functionality - please keep this in mind while testing!
# Getting Started
Before using this connector, you'll need to follow our standard setup instructions to install Speckle Manager and add a Speckle account.
As this connector is still in heavy development, see the repo (opens new window) for the latest updates.
# Installation
The easiest way to install the SketchUp Alpha Connector is via the Speckle Manager. Simply open up manager, find the SketchUp Connector, and click "Install".
However, this method only works for Windows for SketchUp 2021. If you'd like to try installing on a different platform or for a different version, you can do a manual installation. Note that the connector has been developed for SketchUp 2021 and has not been tested on older versions or on different platforms. There may be issues, so feel free to report them on the forum (opens new window).
# Manual Installation
# 1. Clone the Repository
First, ensure you have git (opens new window) installed.
Run the following command in your terminal to clone the repo:
git clone https://github.com/specklesystems/speckle-sketchup
This will create a speckle-sketchup folder with the connector files wherever you run this command.
# 2. Build the User Interface
Navigate into the ui/ folder
cd speckle-sketchup/ui
Then run the following commands
npm install
npm run build
This will create a html folder inside the speckle-sketchup/speckle_connector folder.
# 3. Add the Connector to SketchUp
Find the Plugins folder for your SketchUp installation. On Windows for SketchUp 2021, the folder will be at:
C:\Users\{YOU}\AppData\Roaming\SketchUp\SketchUp 2021\SketchUp\Plugins
Once you've found the equivalent for your OS / SketchUp version, copy the speckle_connector folder and the speckle_connector.rb file into the Plugins folder.
# User Interface
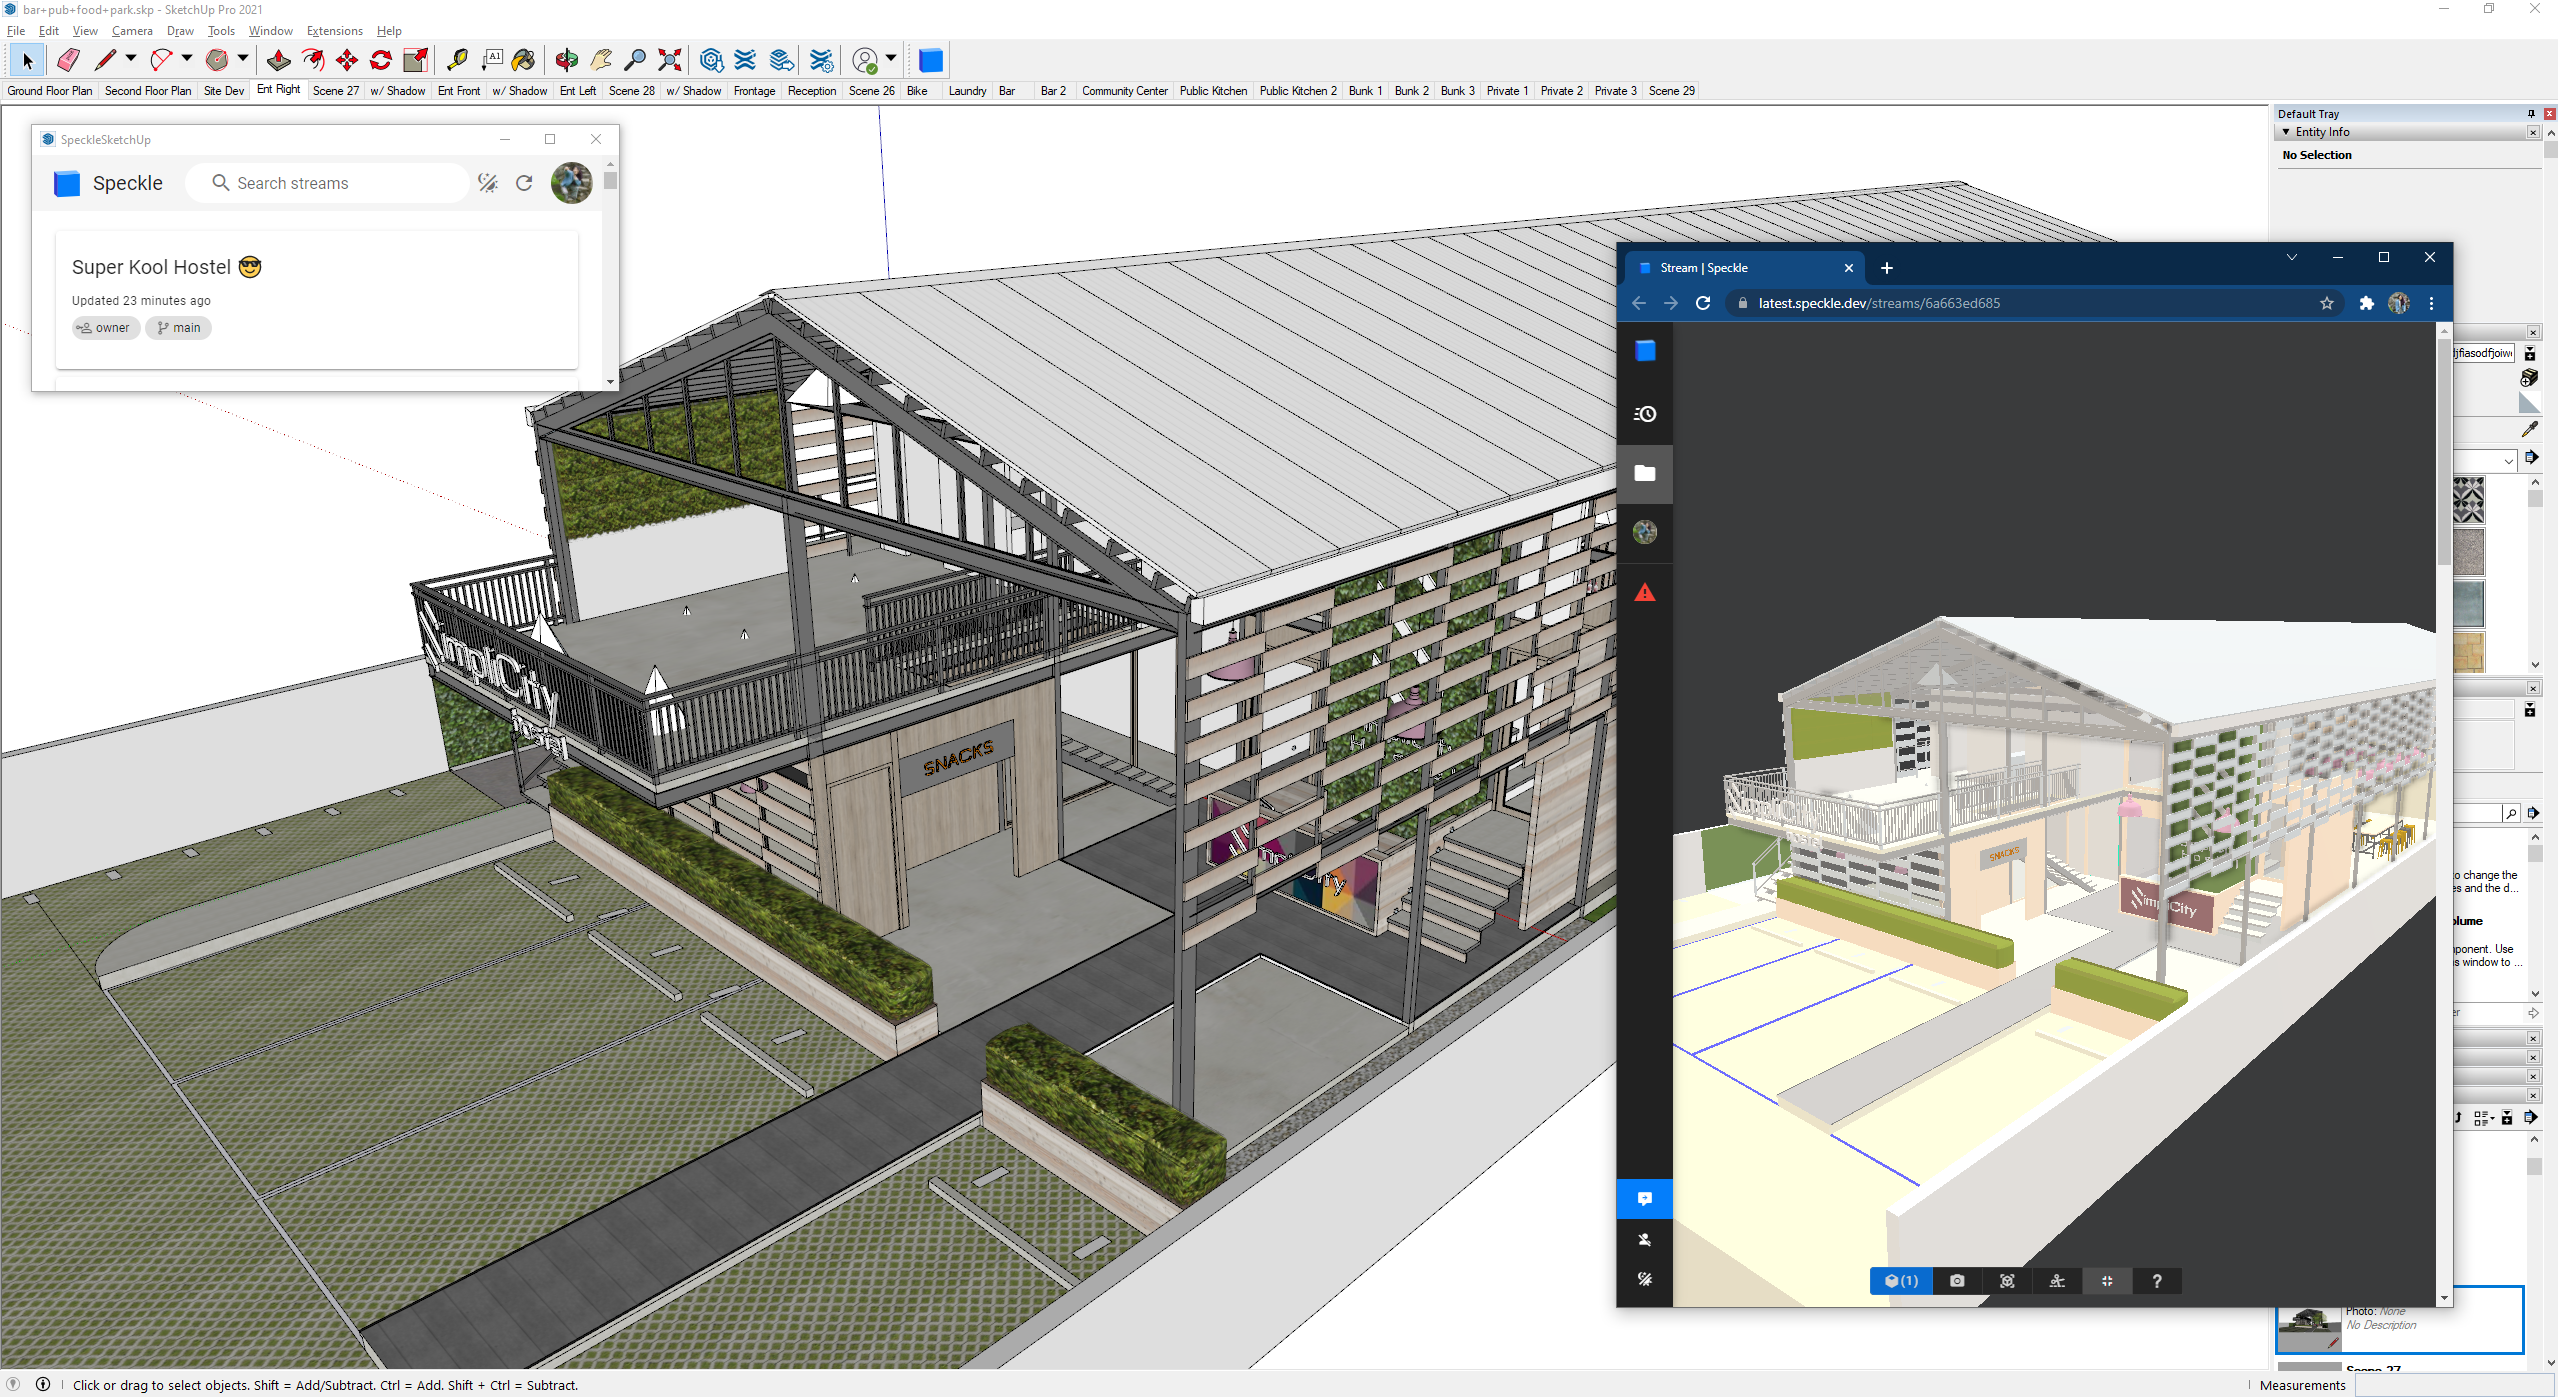
# Sending Data
For the moment, there is only one send mode: selection.
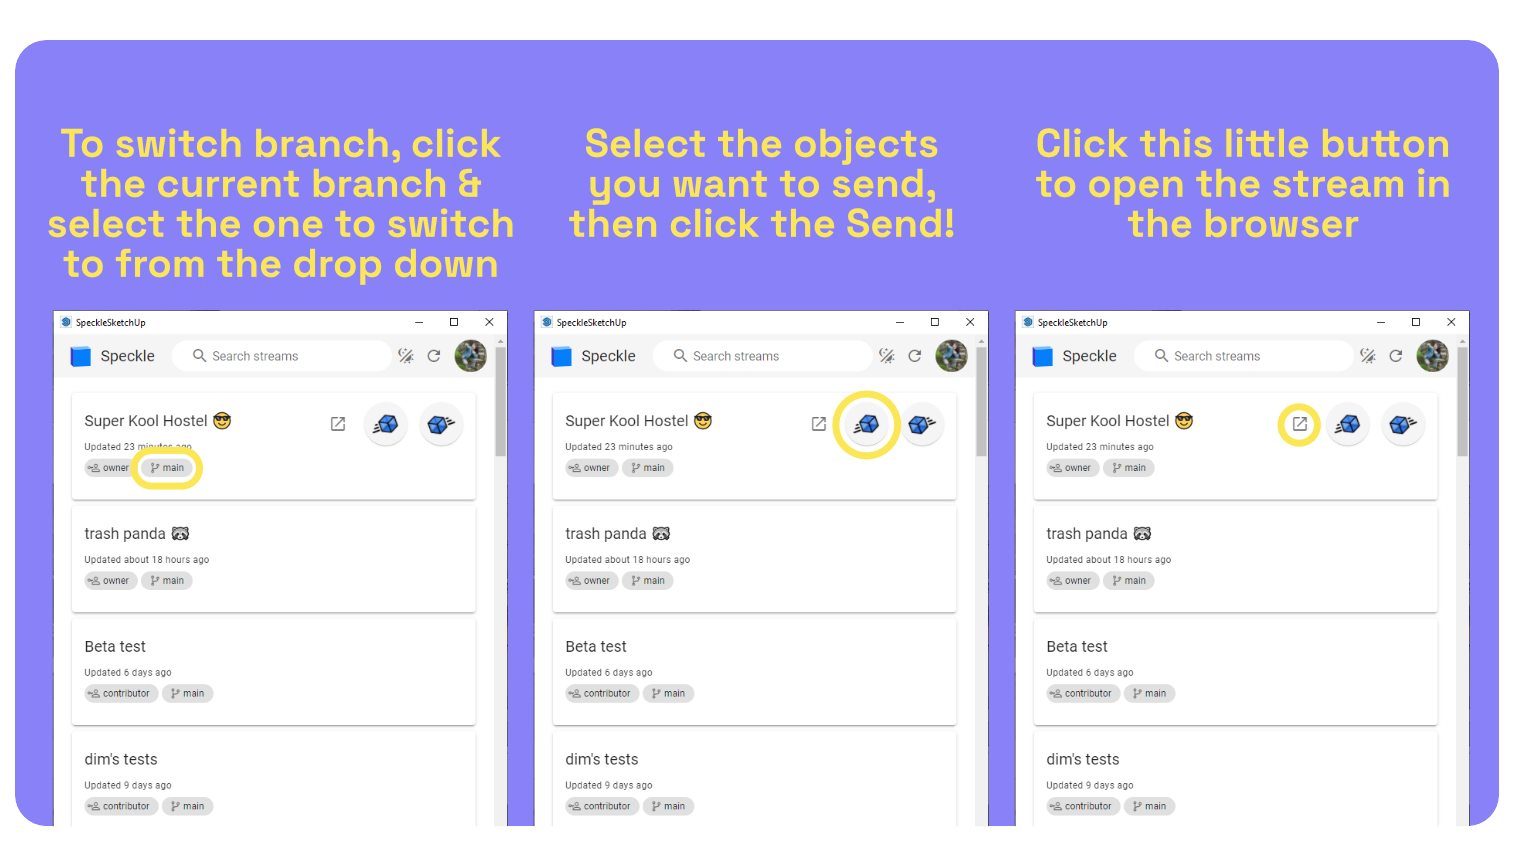
Simply select all the objects you would like to send, then click the "Send" cube. To switch the targeted model, click the currently selected model and find the model from the dropdown menu.
See the gif below for the full process.
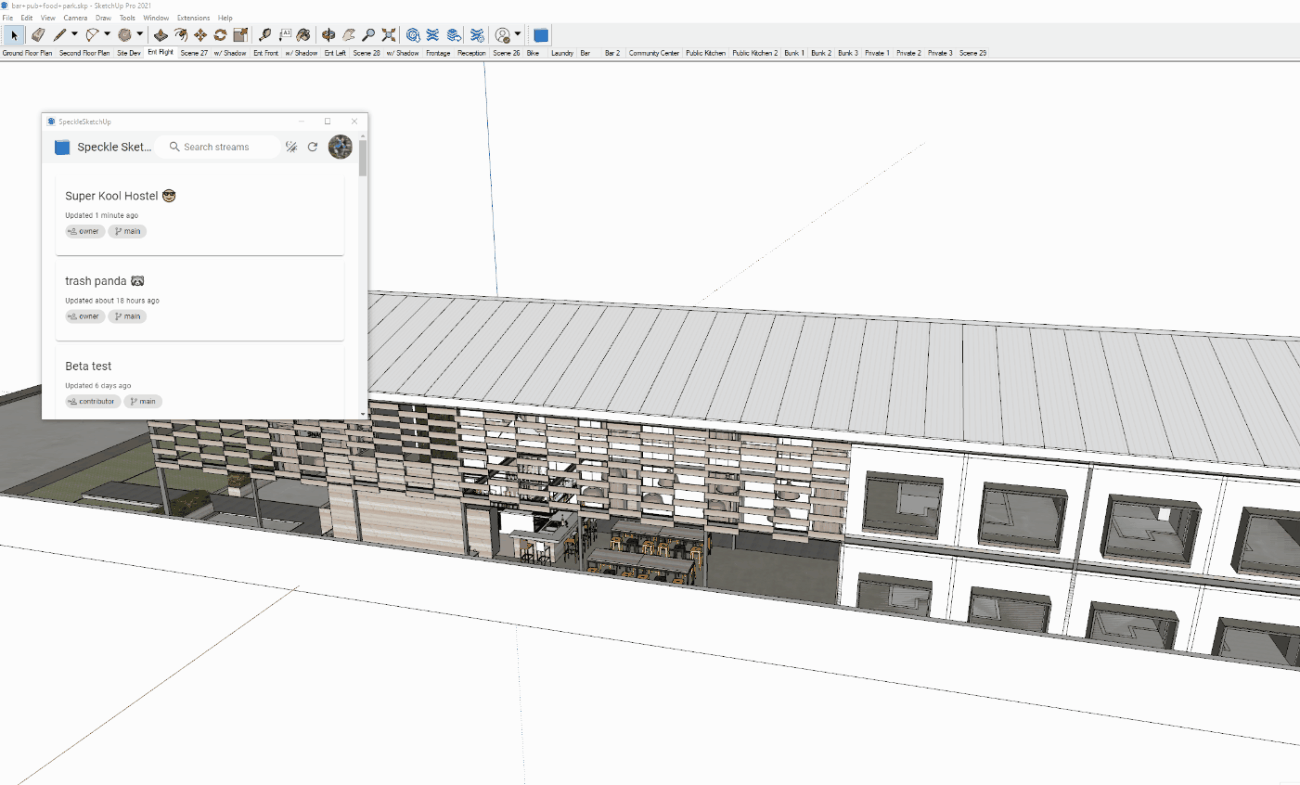
# Receiving Data
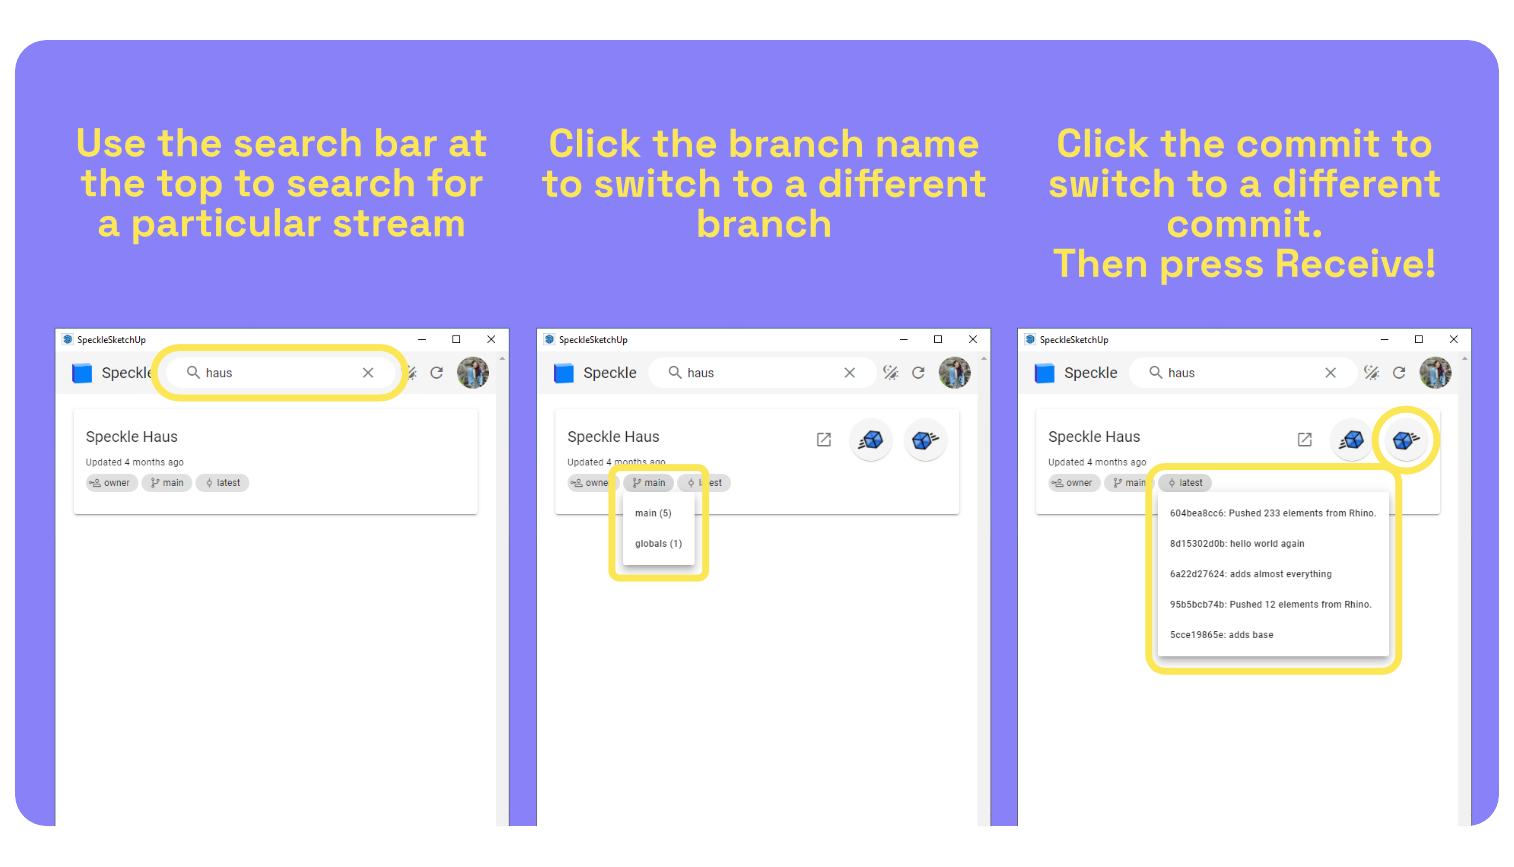
Receiving projects in SketchUp is as simple as clicking the "Receive" cube. As with sending, you can switch the targeted model and the particular version to receive.
Note that if you sent SketchUp groups to a project, they will be received as component instances rather than groups.
See the full process of receiving a Rhino model in this snazzy gif

# Accounts
Your Speckle accounts should be added via Speckle Manager.
You can switch between your accounts by clicking your profile image and selecting it from the popup menu.
